Aren’t you getting tired of customers visiting your pages and leaving without making any purchase decisions?
Then you need a sales funnel to guide your potential customers smoothly from initial interest to final purchase.
A sales funnel is a strategic, multi-step journey designed to capture attention, build interest, and ultimately convert leads into loyal customers.
Systeme.io is a popular website for building sales funnels due to its all-in-one functionality, combining tools for email marketing, automation, and more within a single platform.
In this article, we’ll provide a comprehensive, step-by-step guide to creating a sales funnel using Systeme.io, covering everything from setup to optimization.
Understanding Sales Funnels
By carefully structuring each stage of your funnel, it can effectively guide your potential customers through the buying process and increase their likelihood of conversion.
What is a Sales Funnel?

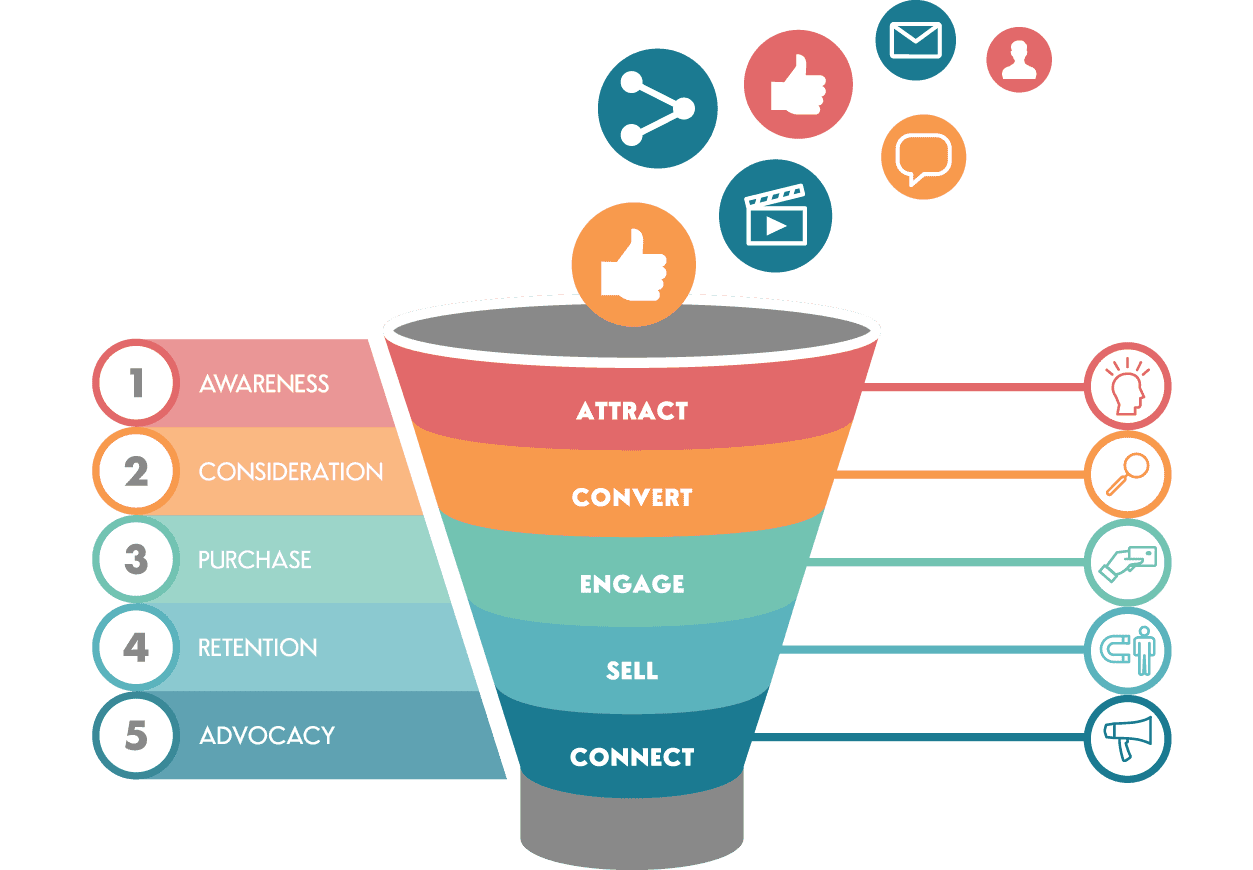
A sales funnel is a series of steps your potential customers go through before they decide to make a purchase.
The stages of a typical sales funnel align closely with the AIDA marketing model.
1. Awareness: At the top of the funnel, this stage is about reaching a broad audience and piquing interest through ads, social media, blog posts, and other forms of outreach.
2. Interest: Once aware of the product, your customers may engage with more detailed content, such as webinars, emails, and guides that educate them about your offerings.
3. Decision: At this stage, prospects have shown considerable interest and are considering a purchase.
4. Action: Finally, the action stage is where conversions happen. Your customers make the purchase or complete the intended action.
The success of a sales funnel lies in its ability to guide prospects smoothly from one stage to the next.
The primary objective of the awareness stage is to create visibility and attract attention.
While Interest Stage’s goal is to capture attention and build credibility. Your content should be educational and showcase how the product can solve specific problems for customers.
The decision-making stage is where customers evaluate the product’s benefits more seriously.
The final push (Action stage) is to convert leads into paying customers.
Each stage serves as a checkpoint to qualify leads, meaning only those genuinely interested in the product move forward.
Benefits of Using a Sales Funnel
Sales funnels are valuable for businesses due to their strategic structure and systematic approach to lead conversion.
1. Increased Conversion Rates: A structured funnel helps you filter out uninterested visitors early on. This will help you focus on leads who are genuinely interested.
2. Automated Marketing and Sales Processes: You can automate your sales funnel, and send follow-up emails that provide lead magnets.
3. Building Customer Relationships and Loyalty: Then you can nurture the leads through each funnel stage, allowing building relationships based on trust and value.
Why Choose Systeme.io for Your Sales Funnel?
Systeme.io was created by Aurelien Amacker, a digital marketer who wanted to simplify the way you manage online businesses.
Instead of jumping between different tools for sales funnels, email marketing, memberships, and more, he brought everything under one roof with Systeme.io.
Key Features and Functionalities of System.io
1. Drag-and-Drop Funnel Builder
The drag-and-drop editor lets you build pages, tweak templates, and create custom funnels without fuss. This flexibility makes it easy to match your brand and target audience.
2. Email Marketing Built In
Email marketing also permits you to create automated email sequences, organize subscribers with tags, and even build different lists based on customer behavior.
3. Membership Site Creation
Guess what? You’ll appreciate Systeme.io for including tools to set up membership sites. It makes managing content access, handling payments, and even creating drip content (where lessons are released gradually) a breeze.
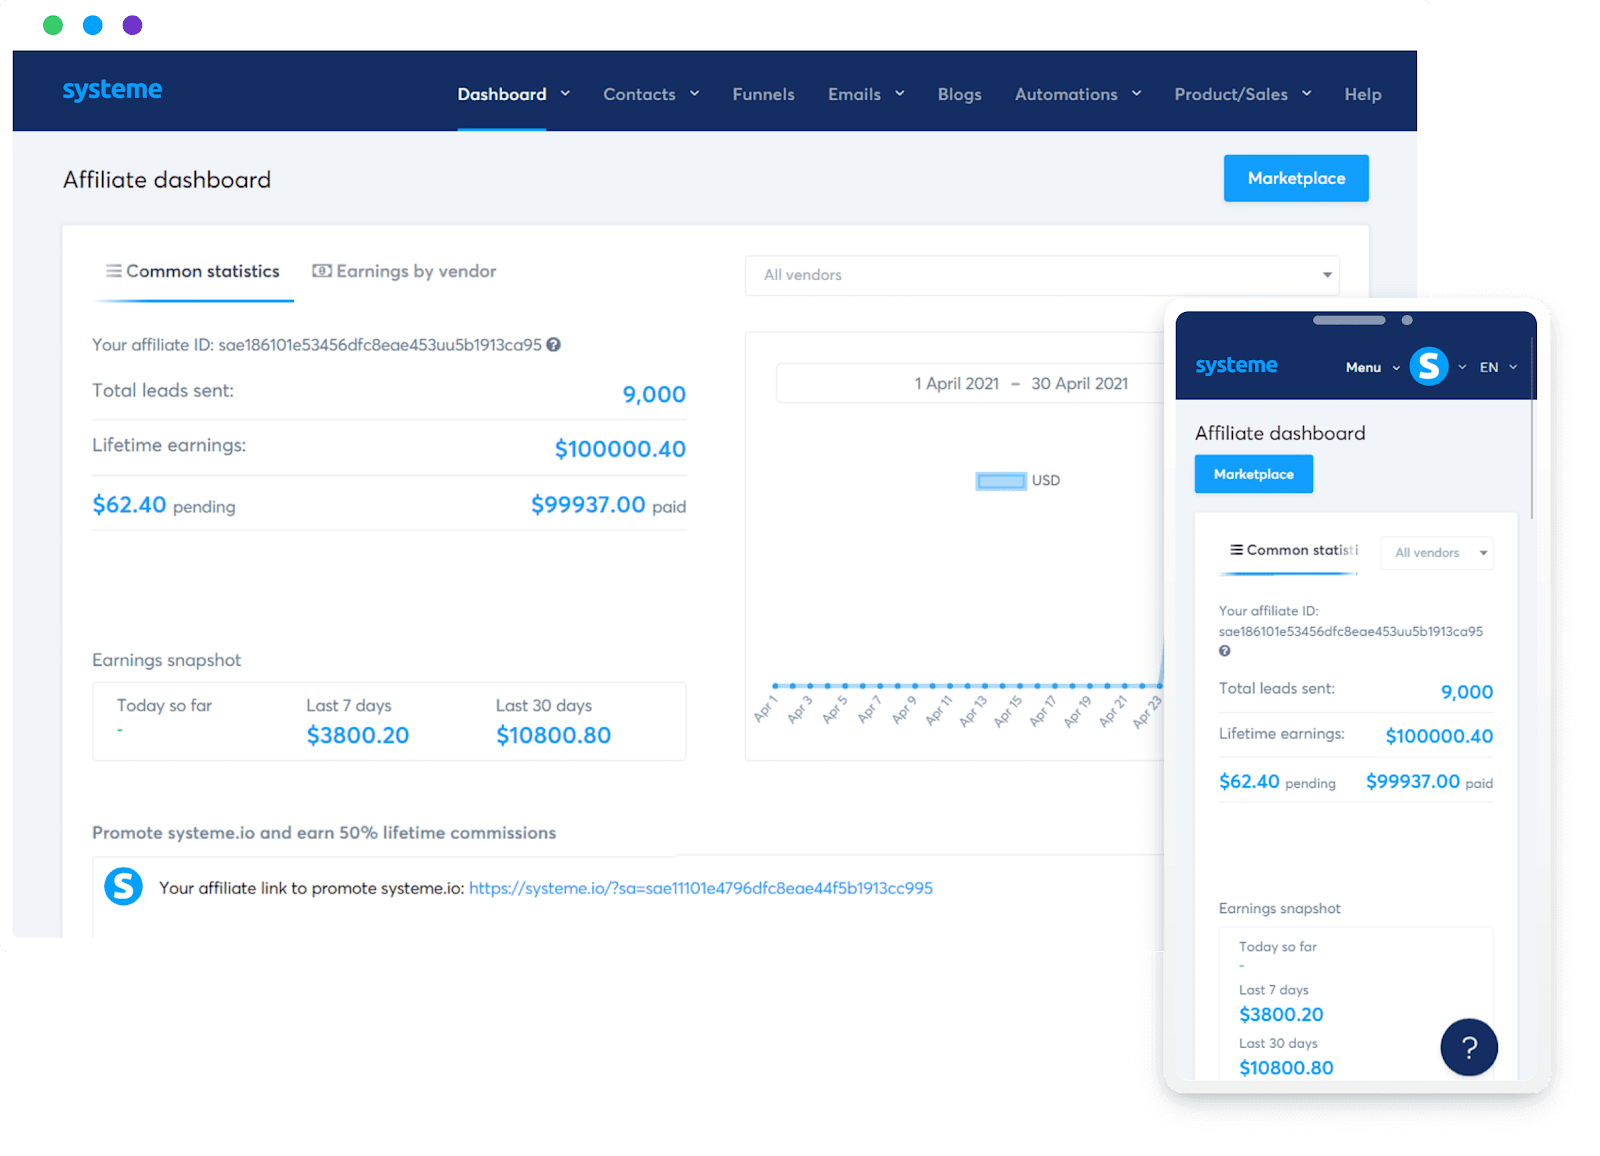
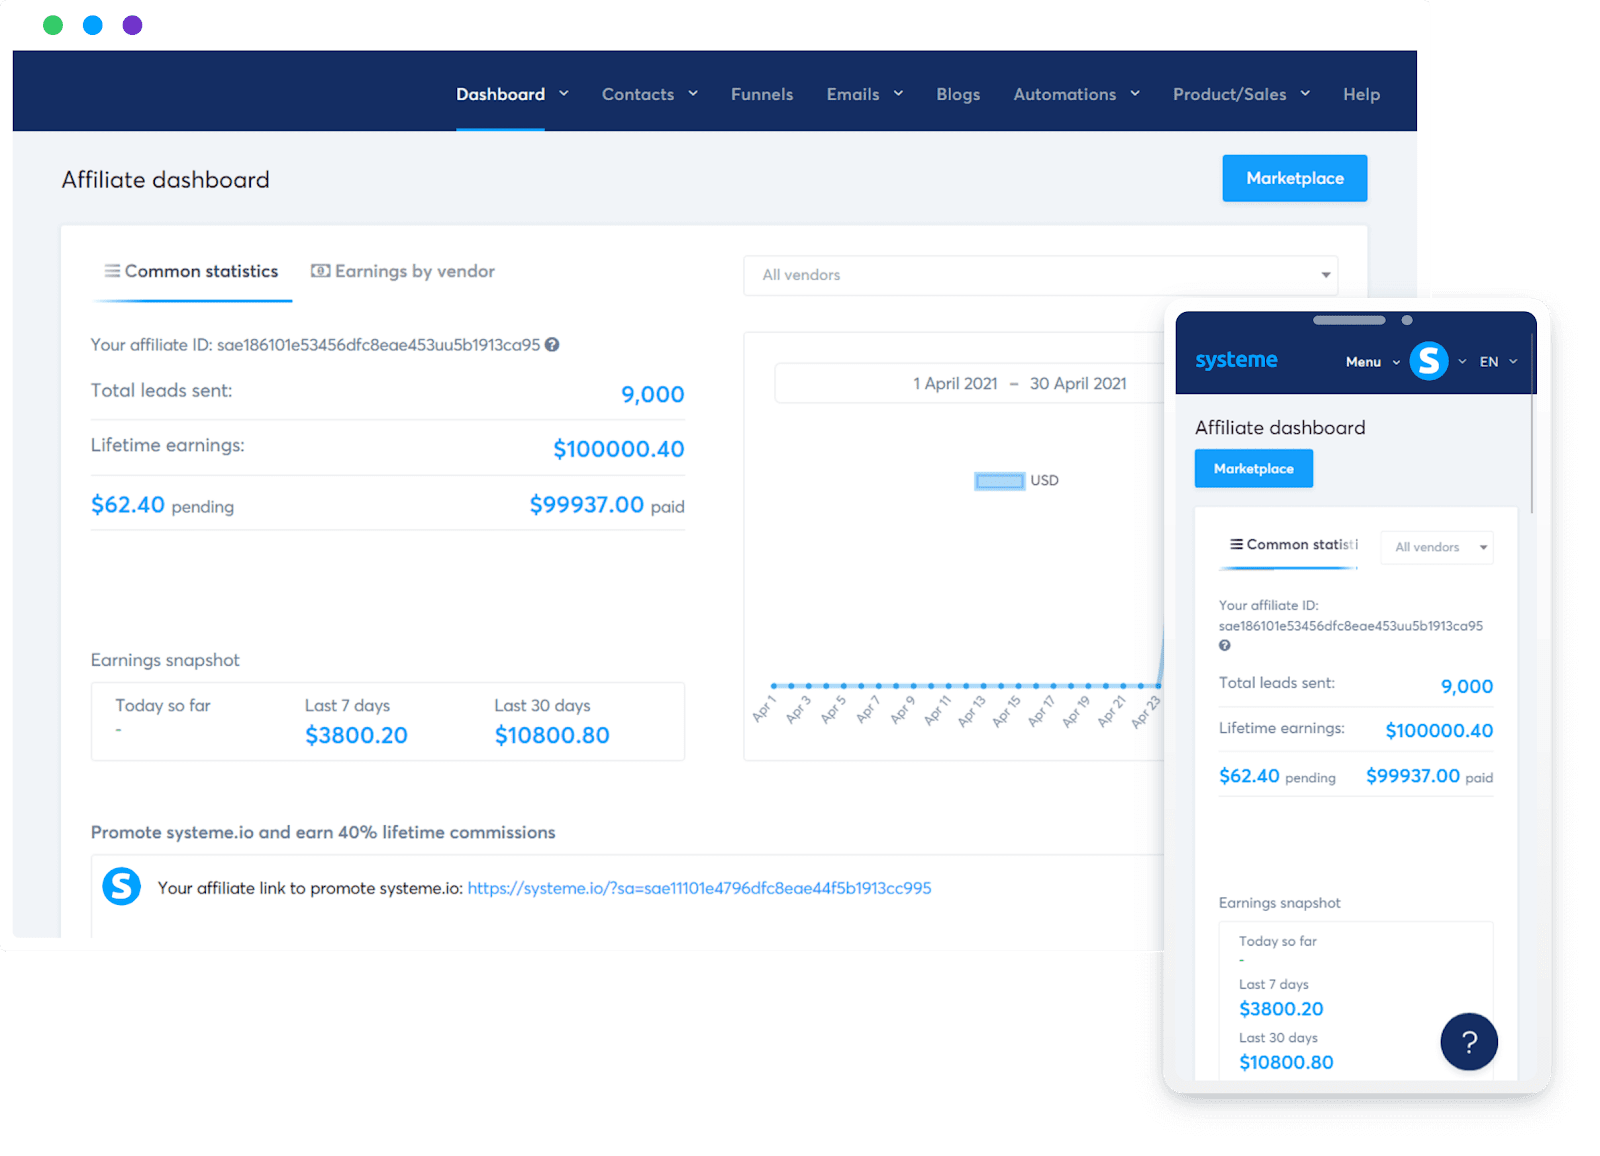
4. Affiliate Management Tools
Systeme.io’s built-in affiliate management lets you recruit, track, and reward your affiliates. You can monitor your progress, manage commissions, and let affiliates promote your products for extra exposure.
5. Automation Rules to Save You Time
Automation is key for scaling, and Systeme.io’s automation rules allow you to set specific triggers based on customer actions. You can send a welcome email when someone subscribes.
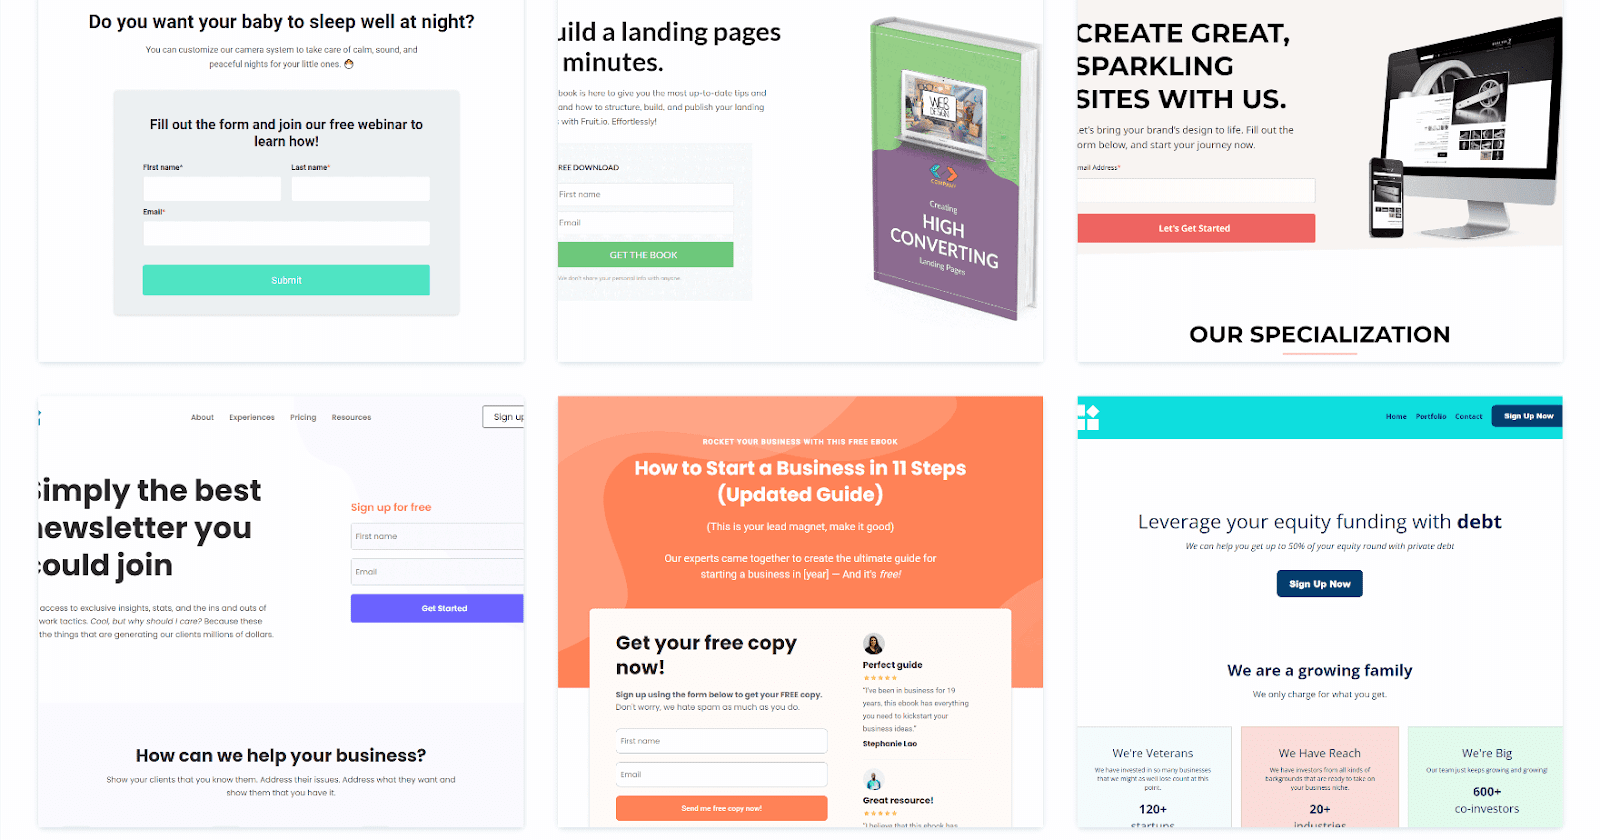
6. Wide Selection of Templates
There are templates for nearly everything you need to design starting from landing pages, sales pages, emails, and more.

Advantages of Systeme.io Over Other Funnel Builders
1. Easy to Use
2. Affordable and Flexible Plans
3. All-in-One Solution
4. Reliable Support and Strong Community Feedback
Limitations to Be Aware Of
1. Limited Third-Party Integrations
2. A Bit of a Learning Curve for Beginners
Preparing to Create Your Sales Funnel
Here’s a breakdown of the key steps to get you started on a funnel that brings real results.
1. Identifying Your Target Audience
The foundation of any successful sales funnel is a deep understanding of who you’re targeting.
This understanding will help you craft messages that resonate, leading to stronger engagement and higher conversion rates.
Customers are more likely to respond positively to offers that directly speak to their challenges and goals.
2. Defining Your Sales Funnel Goal
A well-constructed funnel needs a clear goal. You should ask yourself questions like, “What do you want to achieve with this funnel?”
SMART goals can keep your funnel strategy focused and actionable. Here’s how to apply each component to your sales funnel:
Specific – Define exactly what you want to achieve. Instead of “increase sales,” aim for “generate 200 leads per month.”
Measurable – Identify metrics to track progress. For example, set targets like conversion rates, number of sign-ups, or total revenue.
Achievable – Make sure your goal is realistic. Start with reachable numbers, then increase as you learn and refine your strategy.
Relevant – Align your goal with your overall business objectives. If the focus is customer acquisition, your goal might be lead generation, not necessarily direct sales.
Time-bound – Set a timeframe, like “achieve 500 email sign-ups in three months.” This adds urgency and helps you stay focused.
3. Mapping Out Your Funnel Strategy
To create a successful sales funnel, it’s important to map out each stage with purpose.
Your funnel structure can start with the lead magnet which grabs attention and encourages sign-up, creating an initial touchpoint.
Moving forward, tripwire can turn leads into customers with a low-risk, high-reward purchase.
The upsells and downsells then give options for higher or lower investments.
Finally, the thank-you page closes the loop makes customers feel appreciated, and encourages future engagement.
Step-by-Step Guide to Creating a Sales Funnel in Systeme.io
This step-by-step guide will walk you through each stage, from setting up your account to fine-tuning your funnel for the best results.
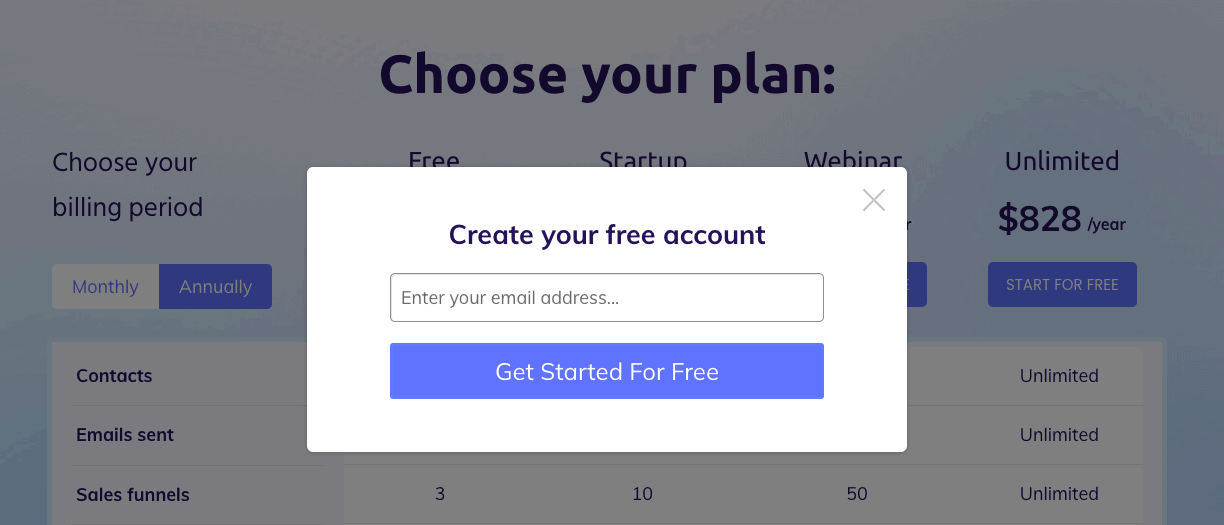
Step 1: Sign Up for a Systeme.io Account
Start creating your Systeme.io account by choosing a pricing plan that aligns with your business needs.
If you’re new, the free plan is a good starting point, and you can always upgrade as your business grows.
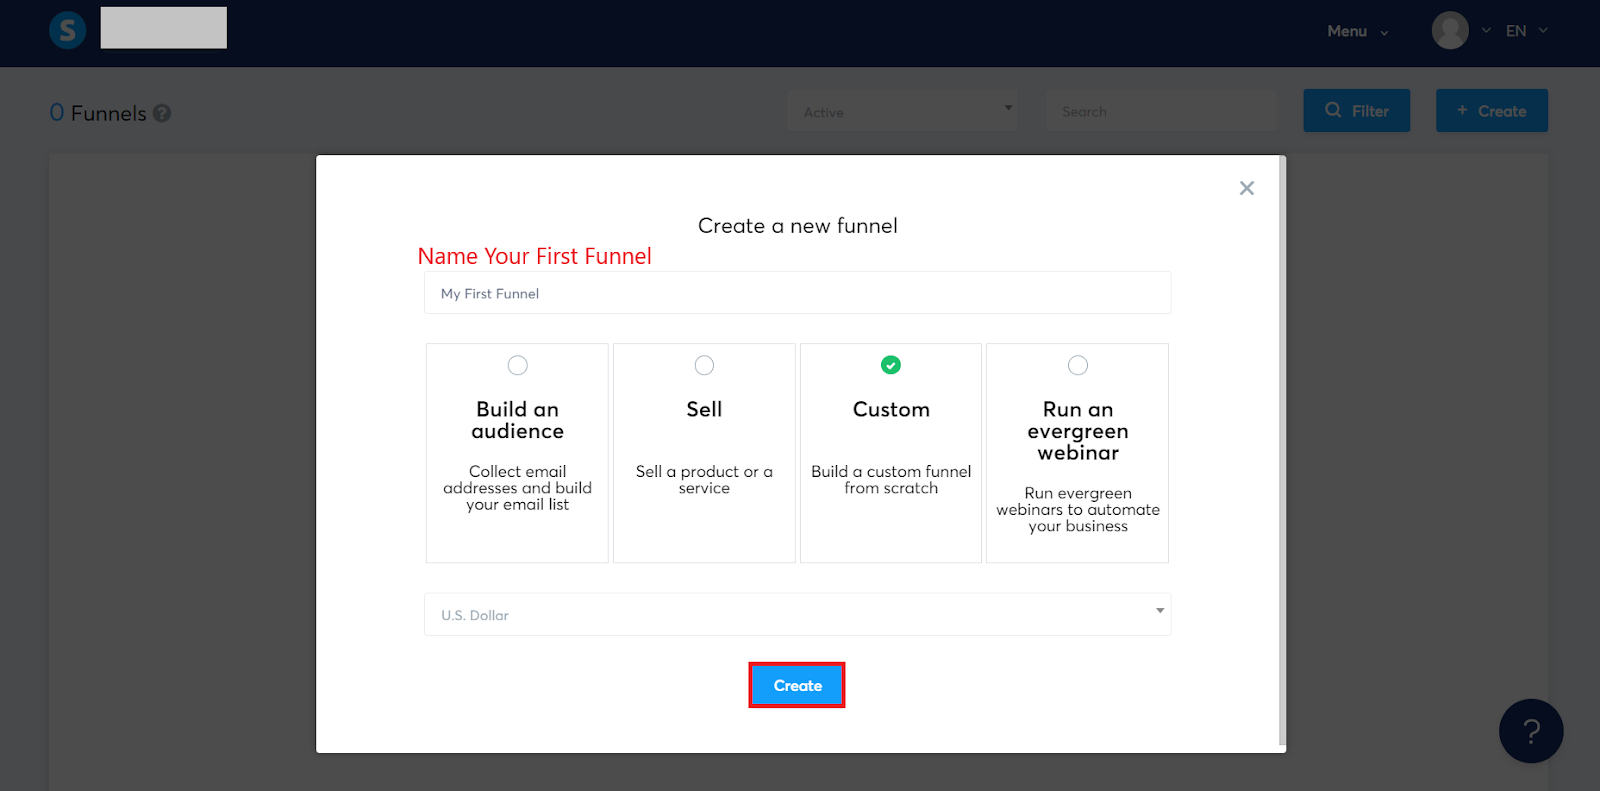
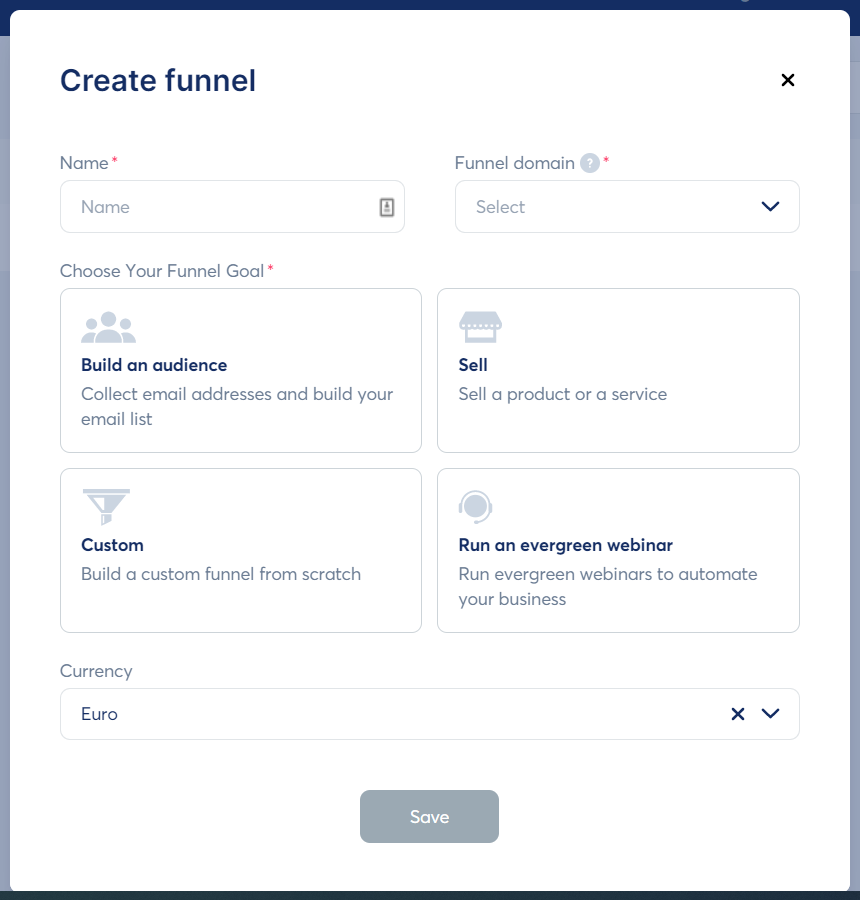
Step 2: Create a New Sales Funnel
After logging in, navigate to the dashboard and select “Funnels” from the main menu. Click “Create” to begin a new funnel.
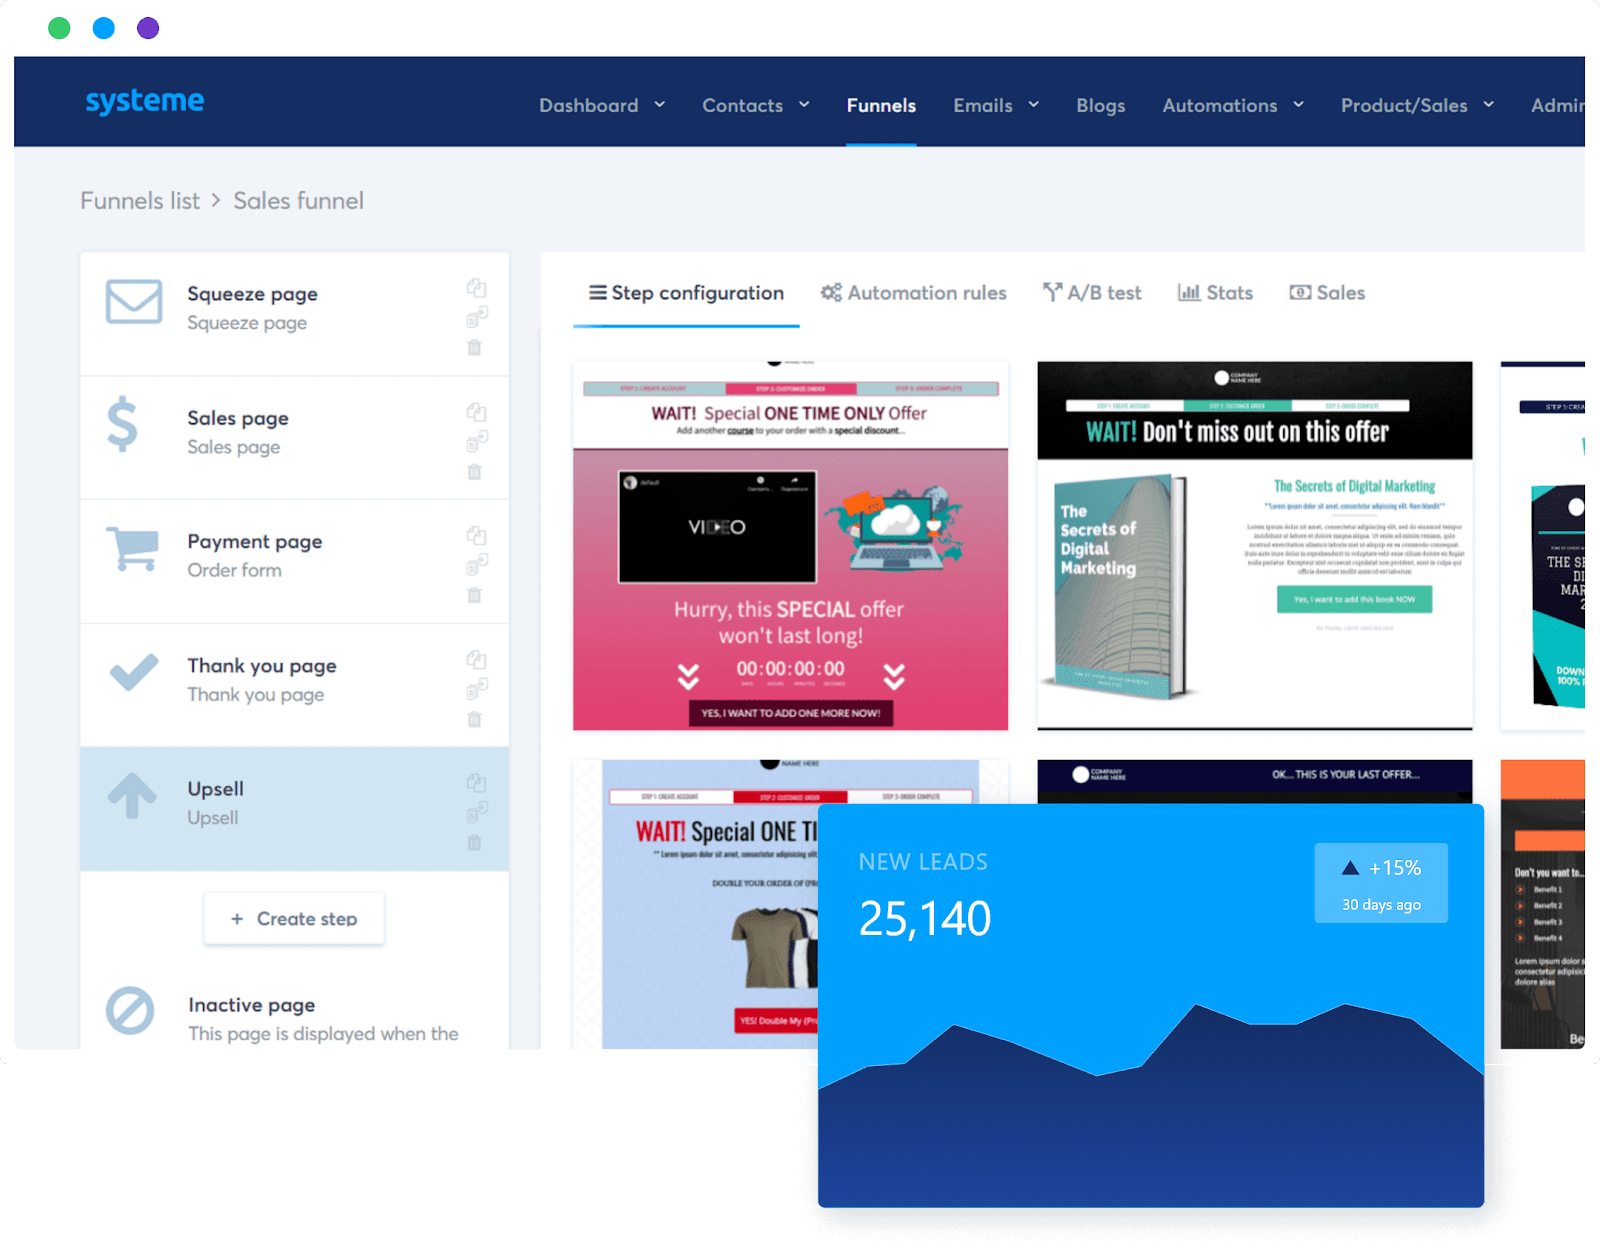
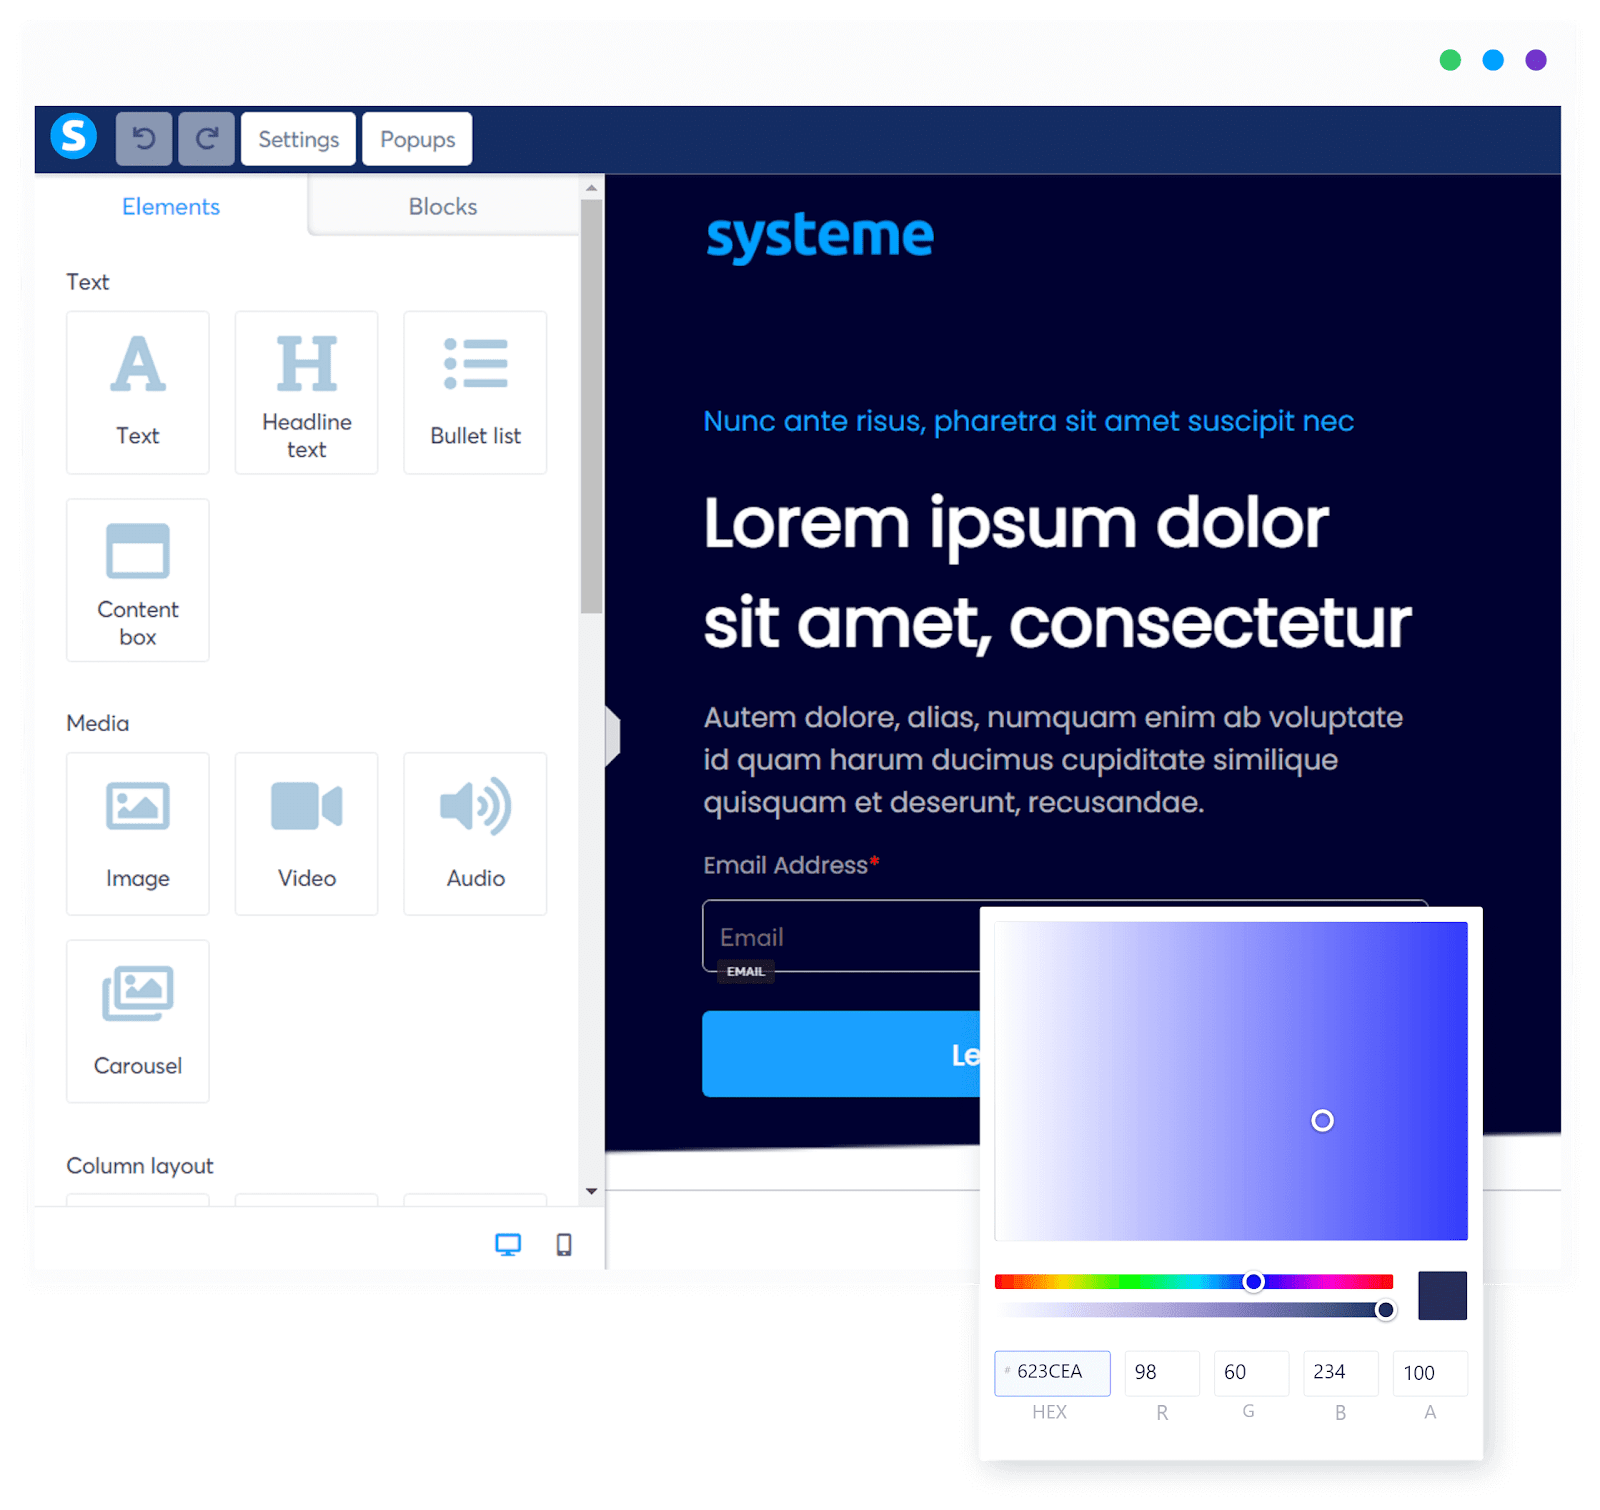
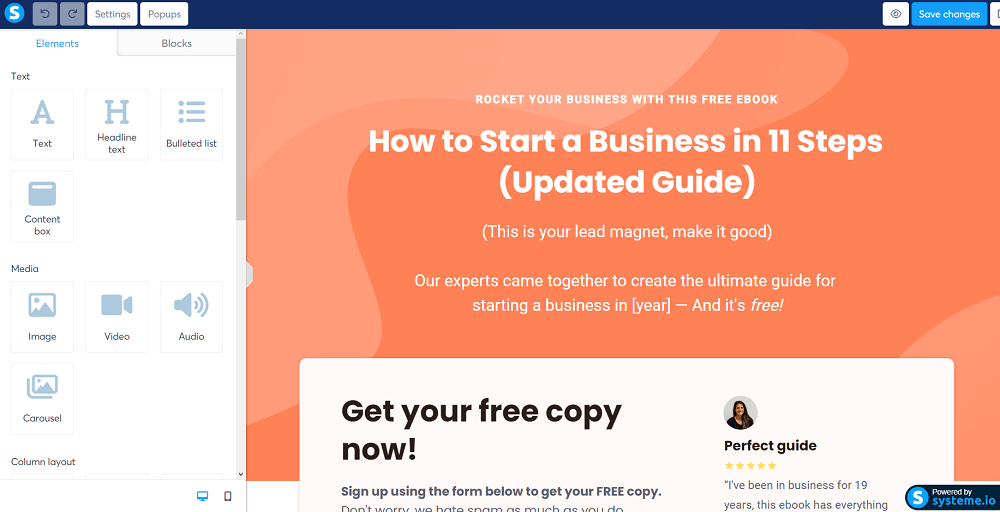
Step 3: Setting Up Your Funnel Pages
Once your funnel is created, it’s time to add and customize the individual pages. Each funnel typically includes key pages like a landing page, thank-you page, and sales page.
Step 4: Configuring Email Sequences and Automations
Systeme.io’s email marketing tools let you automate follow-ups, keeping leads engaged throughout the funnel. For example, you can set up a rule to send a welcome email when someone subscribes, then follow up with a series of emails highlighting your products or services.
Step 5: Adding Payment Methods and Configuring Payments
For a smooth checkout experience, you need to set up payment gateways within Systeme.io.
Read Also: Honest Systeme.io Review 2024 – Is It Really All Free?
In your funnel settings, you can create product offers, specify pricing, and set up payment plans if needed (e.g., one-time payments, and monthly subscriptions).
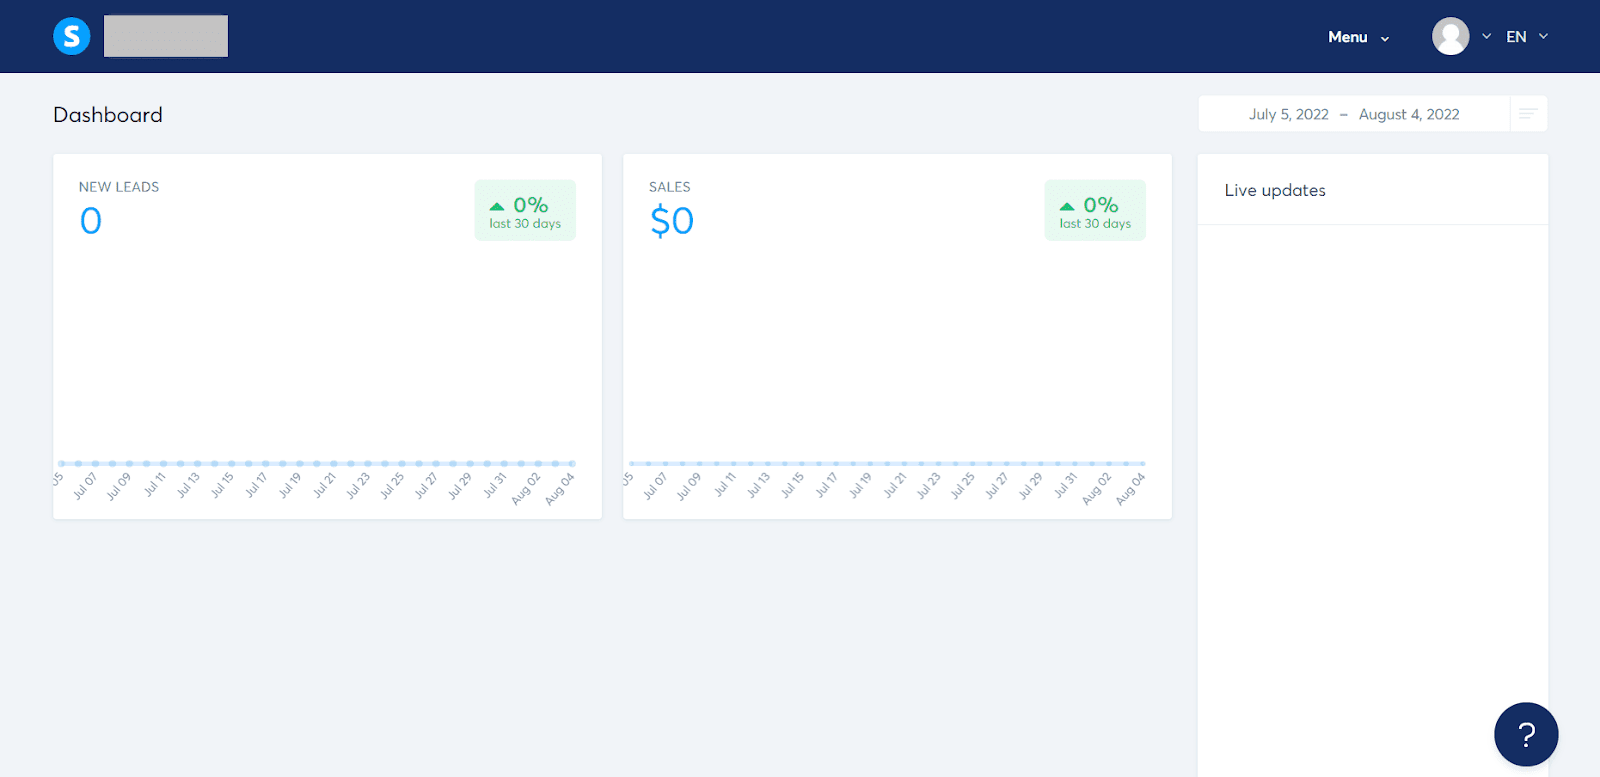
Step 6: Tracking and Analyzing Funnel Performance
Once your funnel is live, you should start monitoring its performance. Systeme.io provides analytics that can help you assess how well each stage is performing.
So you can track metrics like conversion rates, click-through rates (CTR), and sales.
Step 7: Testing and Optimizing Your Funnel
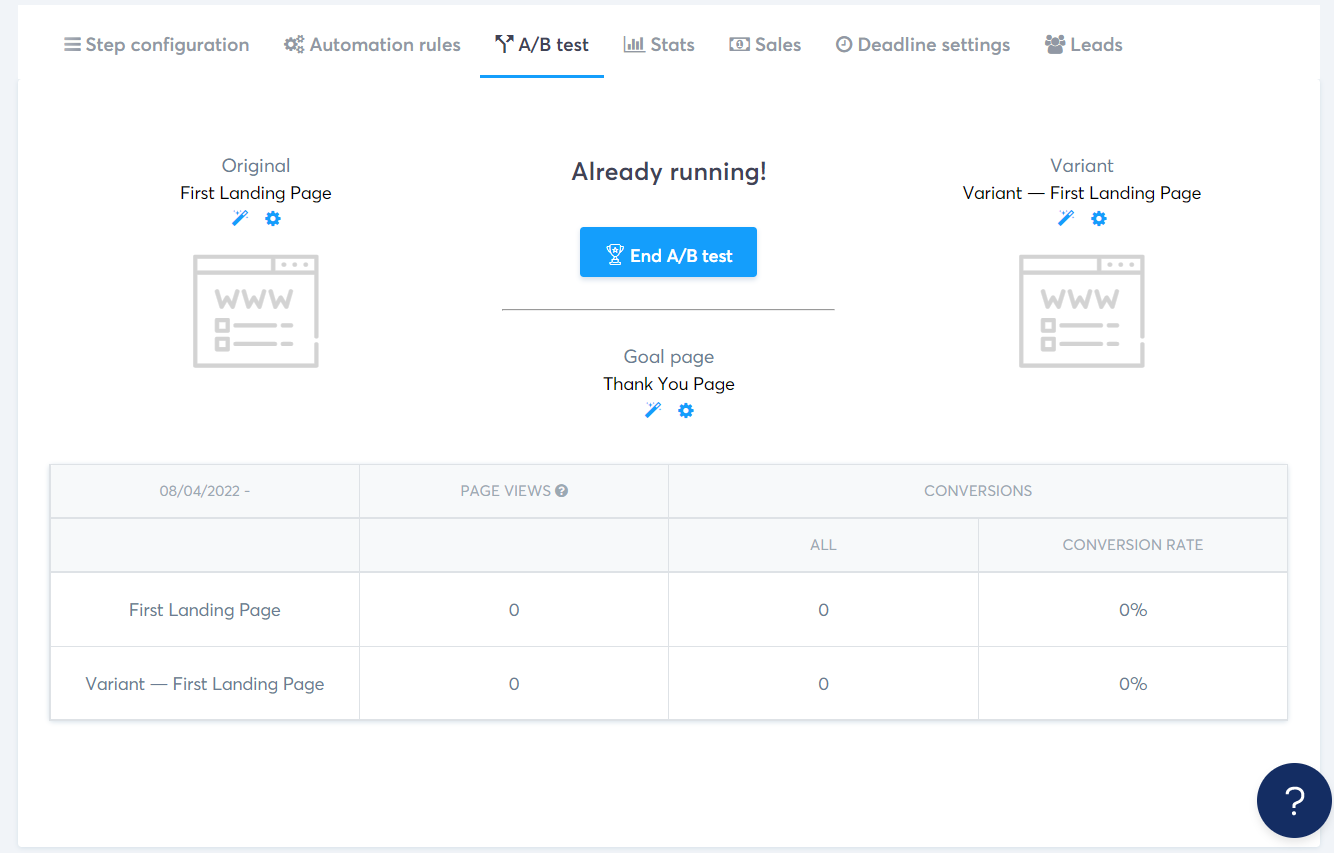
Continuous optimization will ensure that your funnel performs at its best. Therefore, Systeme.io supports A/B testing so you can experiment with different elements.
You can try out different headlines, CTA placements, or email content variations. Run tests on each change, review the performance, and choose the versions that lead to better conversions.
Following this guide will help you build a simple funnel ready to attract, engage, and convert your audience into loyal customers.
Advanced Tips for Optimizing Your Sales Funnel
Once you’ve built the foundation of your sales funnel, here are some advanced strategies to help you convert more leads and maximize revenue in your Systeme.io sales funnel.
1. Use Split Testing to Improve Conversion Rates
A/B testing, or split testing, lets you experiment with different elements of your funnel to identify what resonates best with your audience.
Start by selecting a single element to test, like headlines, CTAs, or images. Testing one variable at a time provides clearer results.
In Systeme.io, create a duplicate of your existing page and make the necessary changes to one version (e.g., a new CTA or image).
Systeme.io then allows you to direct traffic to both versions, so set it up to split your audience equally between the two pages.
Once you’ve gathered enough data, keep the higher-performing elements and continue testing new variables to optimize each funnel stage.
2. Leverage Upsells and Downsells
Adding upsells and downsells to your funnel is an effective way to increase revenue per customer by offering additional products or services right after the main purchase.
Your upsell should be a logical next step after the main offer (e.g., a premium version or add-on).
In Systeme.io, go to your funnel settings and add an upsell page after the main sales page. Customize this page to show the additional offer with a compelling copy and a clear CTA.
If your customer declines the upsell, offer a down-sell (an alternative product at a lower price). This keeps leads engaged without pressuring them into a more expensive option.
Remember to place your upsell and down-sell offers after the customer has committed to the main purchase, as they’re more likely to add additional items when they’re already in the buying mindset.
3. Incorporate Scarcity and Urgency Tactics
Scarcity and urgency create a psychological incentive for customers to act quickly.
You can create promotions that are only available for a specific time frame using Systeme.io to add countdown timers to your pages.
Adding to that, you can mention that only a certain number of spots or units are available, add urgency in your follow-up emails, trigger an exit-intent popup offering a special discount, or remind them of the limited-time offer.
4. Automate Follow-Ups with Email Marketing
Email follow-ups are essential for nurturing leads and guiding them through the funnel.
Start by sending a warm welcome email series after someone signs up.
Then educate leads on the value of your product or service by sharing case studies, testimonials, or product insights.
For time-sensitive offers, set up reminders as the deadline approaches. A gentle nudge about an upcoming expiration can drive conversions among those who are on the fence.
5. Personalize User Experiences with Tags and Segmentation
Tags and segmentation help you to organize your audience based on their behavior and preferences.
In Systeme.io, you can assign tags based on actions taken by users, such as signing up for a webinar or purchasing a product.
Use these tags to send customized email sequences. For example, leads who clicked on a specific product link can receive emails with more information about that product, while those who didn’t can get broader content.
By leveraging split testing, upsells, scarcity tactics, automated follow-ups, and segmentation, you can create a refined, high-converting funnel that maximizes both engagement and revenue.
Common Mistakes to Avoid When Building Sales Funnels in Systeme.io
Here are some common mistakes to avoid as you build and optimize your sales funnel in Systeme.io.
1. Ignoring Funnel Optimization
2. Overloading Funnel Pages with Too Much Information
3. Not Following Up with Leads
4. Failing to Set Up Proper Tracking
Avoiding these common mistakes can go a long way in creating a high-performing funnel in Systeme.io.
Real-Life Examples of Successful Sales Funnels Built with Systeme.io
Case Study 1: Huel’s Sales Funnel with Instagram Shop
Huel, a renowned brand offering plant-based food products, leverages Instagram to drive organic traffic. They integrate the Shop feature on their Instagram page, leading users directly to their sales funnel from the platform itself.
Huel’s approach is a masterclass in using social media to guide users through an organic, customer-centered journey that ends in conversion.
This funnel is a real example created in Systeme.io, where you can set up landing pages, integrate email lists, and automate follow-ups.
Case Study 2: Beardbrand’s Sales Funnel with Content Marketing
Beardbrand is an eCommerce brand specializing in beard grooming products, with a powerful presence on YouTube.
They use System.io to drive traffic from their educational and engaging video content to their online store.
Beardbrand’s funnel focuses on building trust and community, essential for creating a loyal customer base.
This strategy is highly effective for content-driven brands and was implemented with Systeme.io’s email marketing tools and landing page features.
Case Study 3: Roma Designer Jewelry’s Sales Funnel with Content Marketing
Roma Designer Jewelry has optimized its sales funnel using systeme.io to capture interest through high-quality blog content.
Roma’s approach to funnel building is grounded in SEO and organic engagement.
This method is ideal for long-term traffic, and Systeme.io’s email capture, newsletter, and automation features help execute this strategy.
These real-life case studies illustrate a variety of funnel strategies that were created and optimized using Systeme.io.
Conclusion
Systeme.io platform makes building and managing a sales funnel straightforward, even if you’re new to digital marketing.
Systeme.io is also very budget-friendly, with a free plan that lets you get started with up to three funnels and essential features. For more advanced needs, you can easily upgrade as your business scales.
Plus, Systeme.io’s analytics and tracking features give you insights to help refine your approach based on real user behavior.
Having mentioned that, System.io has proven to be the perfect option to drive your business growth. Utilize this comprehensive guideline and start bringing your potential customers to take ACTION.
[…] Systeme.io is an all-in-one marketing platform designed to help entrepreneurs and small businesses manage every aspect of their online presence. From building sales funnels and managing contacts to creating online courses and running affiliate programs, Systeme.io aims to be the Swiss Army knife of digital marketing tools. […]