In 2024, creating a high-impact sales funnel is essential for your businesses to turn interest into loyal customer relationships.
ClickFunnels 2.0 is one of the best platforms designed to make this process straightforward.
This complete guide is written for beginners who are ready to unlock the full potential of ClickFunnels 2.0.
I’ll cover everything you need to get started confidently starting from setting up your sales funnel, implementation of its features, common troubleshooting, even tips for best sales funnel practices, and more.
Sit tight and let’s get started!
Getting Started with ClickFunnels 2.0
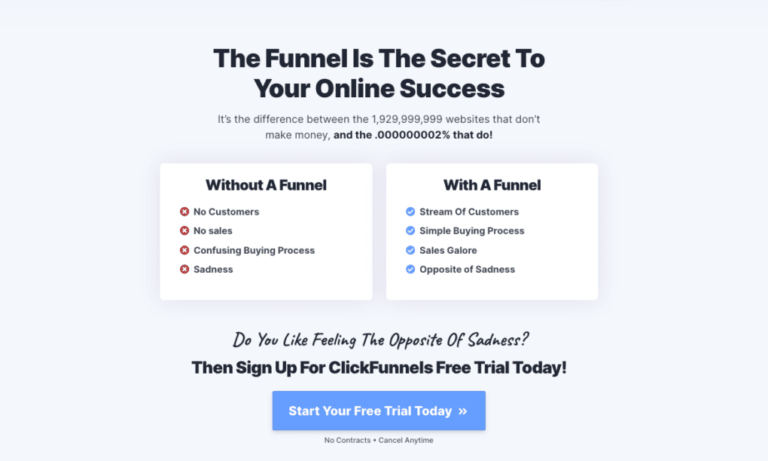
A sales funnel is a series of steps that guide your potential customers from discovery to purchase.
Unlike a regular website where visitors often wander without direction, ClickFunnels 2.0 creates a cool buying experience that turns visitors into customers.
At its core, the funnel builder helps you create pathways that guide visitors toward signing up, purchasing, or joining your community.
Alongside this, ClickFunnels enables you to design a complete website with simple drag-and-drop tools without any coding skills.
You can even boost sales through upsells and downsells, deliver exclusive content, automate billing, and grow recurring revenue.
Beyond sales, ClickFunnels’ CRM keeps you connected with your customers by tracking their interactions and preferences in real-time to build stronger relationships.
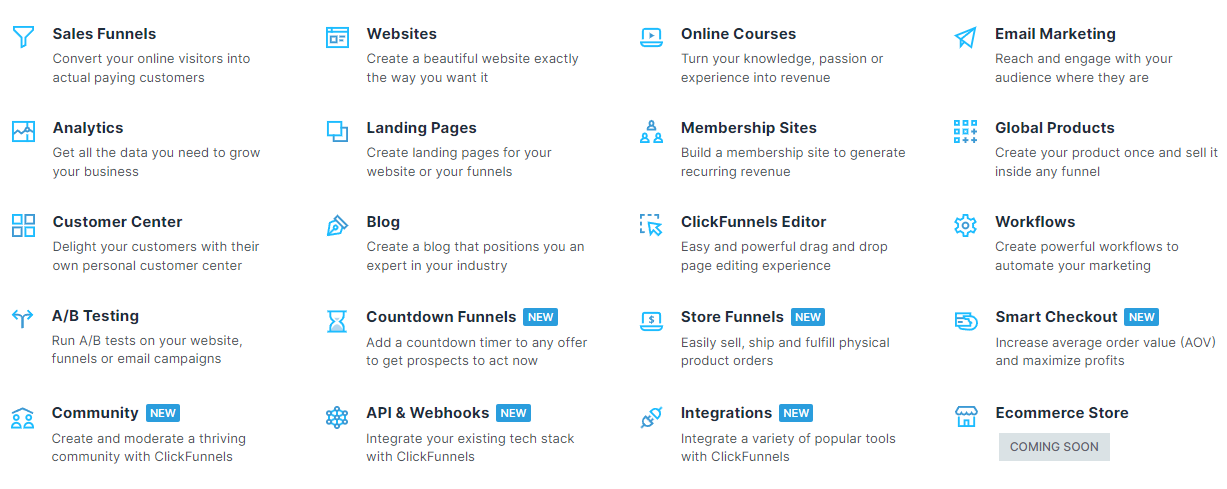
Understanding the New Features in ClickFunnels 2.0

Wow, ClickFunnels 2.0 is stepping up with fresh features to make building and managing your sales funnels easier and more effective.
Let’s go over what’s new and how these updates can benefit your online business.
1. Countdown Funnels
The Countdown Funnels feature is all about creating urgency, which can really help motivate your customers to make that final purchase decision.
This feature even syncs across pages and emails, so your customers consistently see the same countdown that keeps creating a sense of urgency to drive quicker decisions.
2. Store Funnels
ClickFunnels 2.0 now supports online stores for physical products.
You can list products, organise them into collections, and add variations like colour and size. This feature also allows for custom upsells, downsells, and cross-sells.
Plus, it automates essentials like sales tax and shipping labels which take care of logistics.
3. Smart Checkout
The Smart Checkout upgrade includes features like one-click checkout and customizable checkout pages. You can make sure the final purchase step looks polished and in line with your brand.
Smart Checkout even lets your customers make changes, like switching products or upgrading, right in their cart without needing to start over.
4. Community Spaces
Community Spaces bring your customers together in a shared, interactive area.
You can organise topics, moderate posts, and even hide certain topics for specific groups. Your members too can add media and links.
5. Developer API and Webhooks
The API opens up new possibilities for connecting ClickFunnels 2.0 with your other business tools.
Even if coding isn’t your strength, ClickFunnels has partnered with Zapier for you to set up automation with simple copy-paste steps.
6. Expanded Integrations
ClickFunnels 2.0 has broadened its integration options to include popular tools like Klaviyo, Constant Contact, Blastable, and Shippo, among others.
This means you can connect your favourite tools for email marketing, CRM, or shipping directly within ClickFunnels.
Setting Up Your First Sales Funnel
Let’s see everything you need to know to set up your first funnel to avoid feeling intimidated.
To begin, make sure you’re logged into your active ClickFunnels 2.0 account. That’s all you need to get started!
Now you need to decide the best options in setting up your first sales funnel.
1. Using a Template for a Fast Start

- Head to Funnels on the left menu and select Create Funnel.
- Browse through the template library to find one that fits your needs.
- Click Select Funnel to choose your template, and then select Customise Now to begin editing in the Funnel Editor.
2. Building from Scratch for Full Customization
- Go to Funnels > Create Funnel > Start from Scratch.
- Give your funnel a Name and a unique Funnel Path URL (this is where people will find it online).
- Once created, you’ll enter the Funnel Editor, where you can add steps like landing pages, product pages, or checkout options.
3. Leveraging AI with Smart Funnel
- On your Workspace dashboard, click Create Smart Funnel.
- Fill out some details about your business and select the type of funnel you want.
- You can customise colours, and styles, and choose an image layout to match your brand identity.
- Finally, select Create Funnel Now, and in just a few minutes, the AI will create a fully designed funnel with content suggestions.
Designing High-Converting Funnel Pages
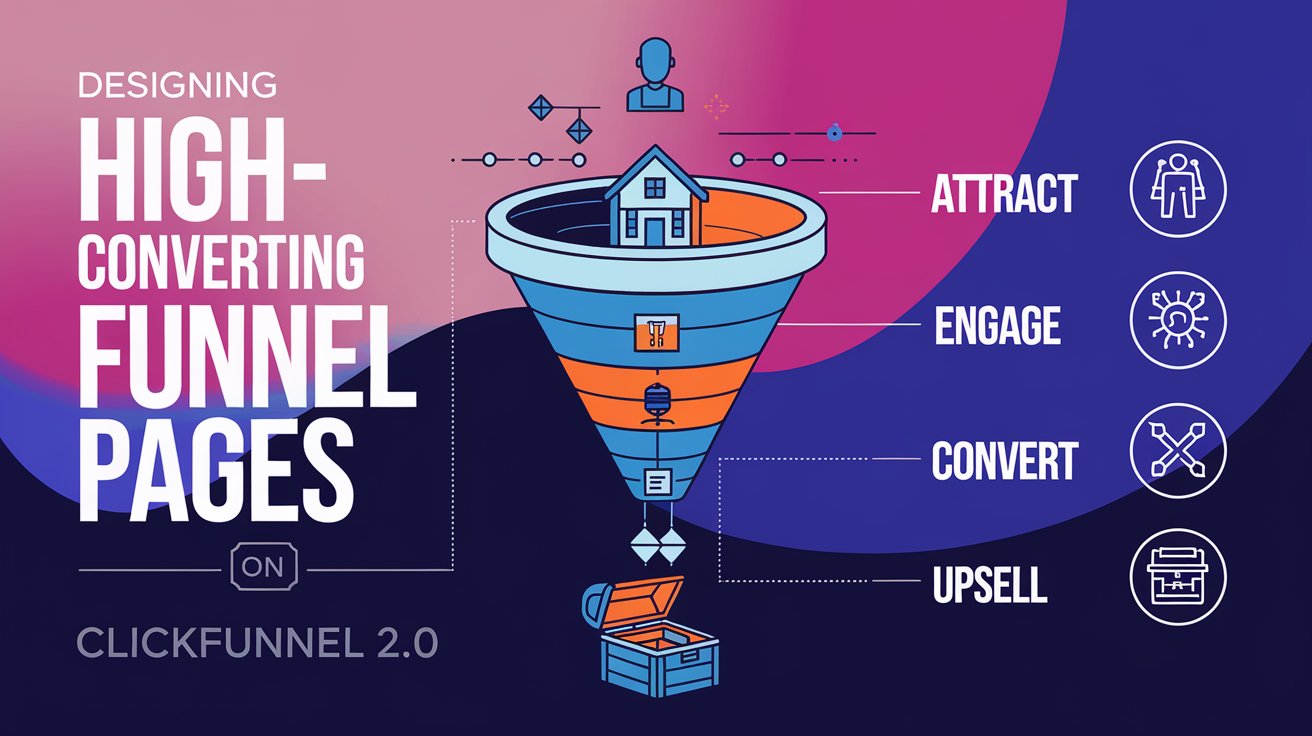
If you can design a high-converting funnel page, it’ll be your powerhouse for turning visitors into leads, customers, and loyal fans.
But crafting one isn’t just about throwing some text and buttons together. Let me give a simple, clear guide to designing funnel pages that make people want to take action.
1. Define Your Funnel’s Goal First
Keep your funnel page focused solely on your objective by skipping distractions or unrelated content. The more focused the page, the higher the chance of conversions.
2. Create an Irresistible Offer
Your offer is the reason visitors will engage, so it needs to stand out.
You should make it something that speaks directly to what your target audience wants or needs.
Also, ensure that it’s valuable and relevant, directly solves a pressing issue your audience faces, and is positioned as something they must have.
3. Choose the Right Funnel Page Format
Selecting the right funnel page format is crucial for engagement.
Squeeze Pages is for short, focused pages with minimal distractions for capturing emails.
Reverse Squeeze Pages offer value upfront, such as a video or preview, before asking for an email.
While Webinar Pages are ideal for event sign-ups, especially if you’re selling a service or high-ticket product.
Therefore, it’s crucial to match your funnel page format to your offer.
4. Use a Proven Template
A tested template can provide a structured layout that guides visitors’ eyes to important elements like headlines, calls to action, and opt-in forms.
5. Write Benefit-Driven Copy
The words you use also matter, especially the headline. This is what grabs attention and gets visitors to keep reading.
6. Add Social Proof to Build Trust
Social proof, such as testimonials or case studies will show that others have benefitted from your offer and this can build trust and credibility.
7. Test and Tweak with A/B Testing
Once your funnel page is live, A/B testing helps you refine it for maximum results.
Start small by testing one change at a time—like the colour of a call-to-action button or the headline wording.
Over time, these small adjustments can add up to big improvements in your conversion rate.
Remember, A/B testing is an ongoing process. Keep testing, learning, and refining to get the best results from your funnel pages.
Adding Products and Payment Gateways
Before adding products, make sure you have an integrated payment gateway in ClickFunnels and an existing funnel with an order step where customers can check out.
Here are the steps you need to follow to add products and payment gateway on ClickFunnel 2.0.
1. Adding a One-Time Product
- Access any funnel with an order-type step.
- Click on the Products tab at the top.
- Choose the option to add a new product, and you’ll start configuring its details.
2. Set Up Payment Options
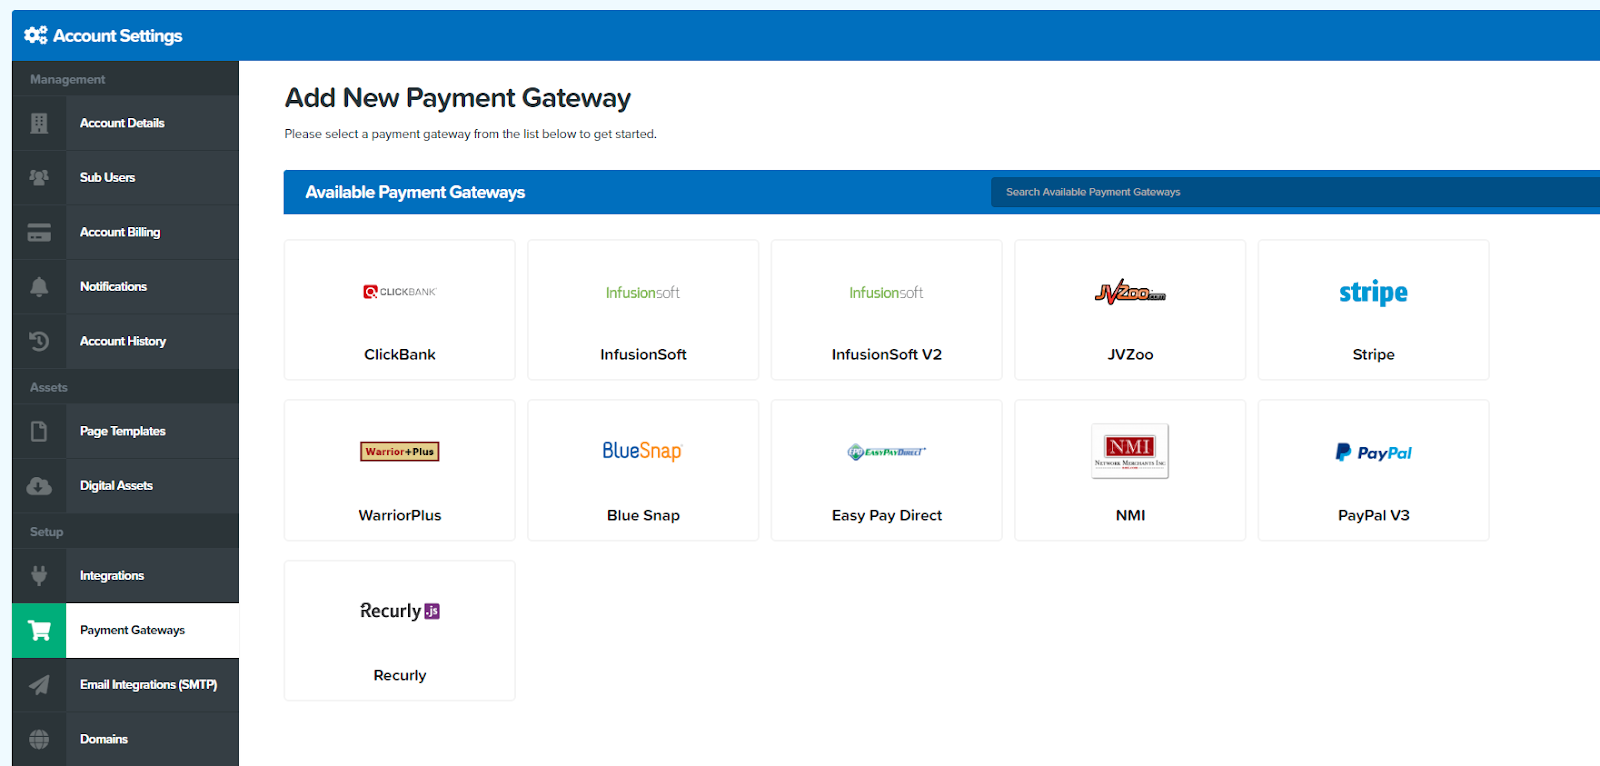
- Under Integration, pick the payment gateway you want to use for this product (e.g., Stripe).
- Since this is a single-purchase item, select the One-Time payment option.
- Click Save and Next to continue.
3. Define Product Details
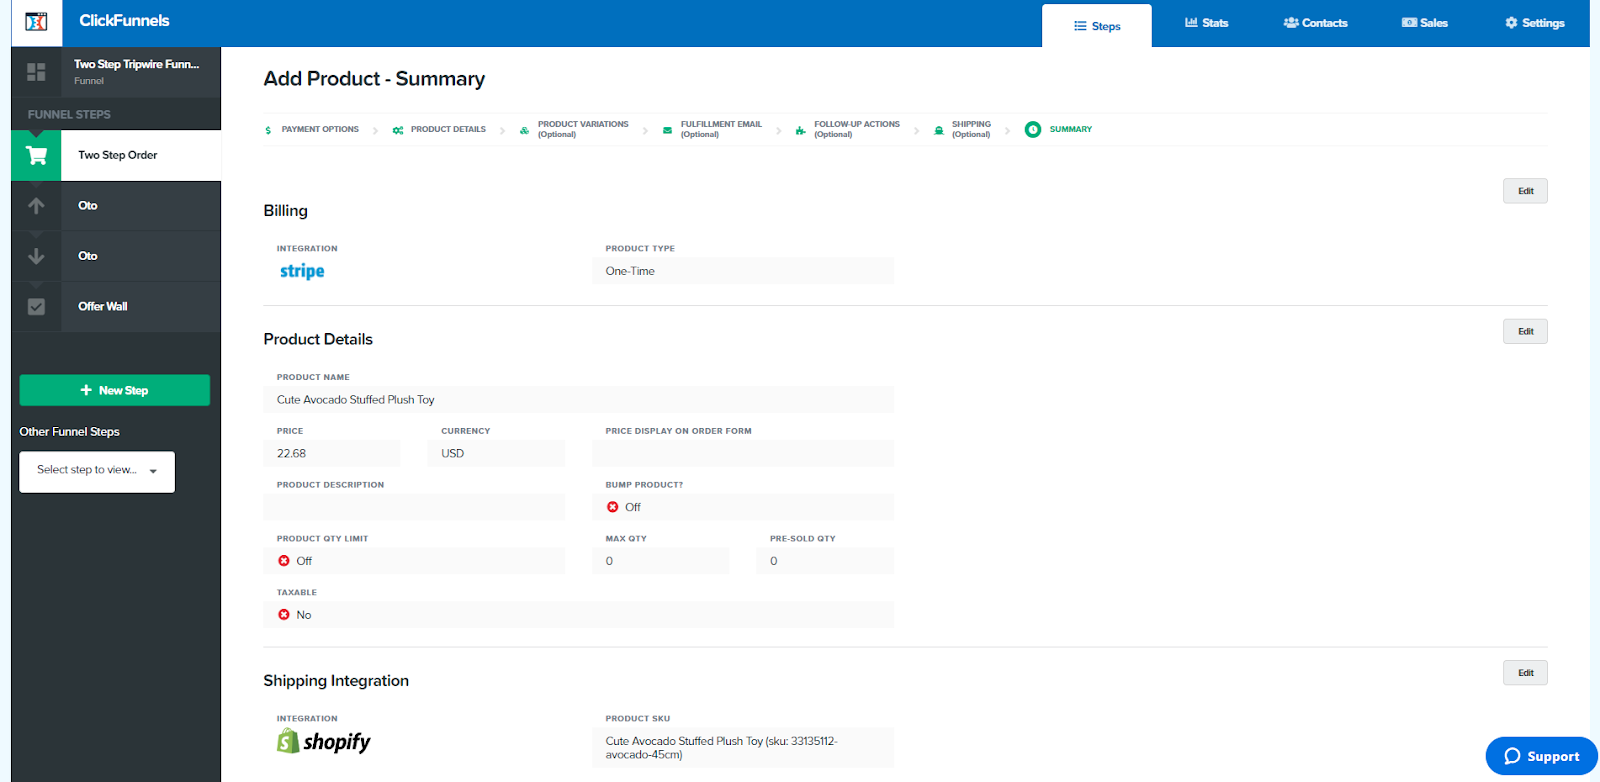
- Assign a name that identifies the product.
- Add the product’s price.
- Select the currency in which customers will pay.
- Specify if the product requires a shipping address.
- Enter a short description that shows up in the billing details.
- Write a clear description for the product to display in the order summary.
4. Set Optional Order Bump and Quantity Limits
- Decide if this product should appear as an “order bump” (a special offer on the checkout page). Remember, the first product can’t be an order bump, so you’ll need to add it afterward if needed.
- If stock is limited, enable the Product Quantity Limiter and set a maximum quantity customers can purchase.
- If you’ve sold this product previously outside ClickFunnels, enter that number under Pre-Sold Quantity for record-keeping.
5. Finalizing the Product Setup
When all required fields are complete, Click Save and Close to finish, or Save and Next if you want to explore optional settings.
Implementing Email Marketing and Automation
Email marketing automation can transform how you engage your audience, nurturing leads and driving conversions without manual effort.
It helps you to send messages automatically based on user actions, like signing up or making a purchase.
Let’s see the steps to Automate Emails in ClickFunnels.
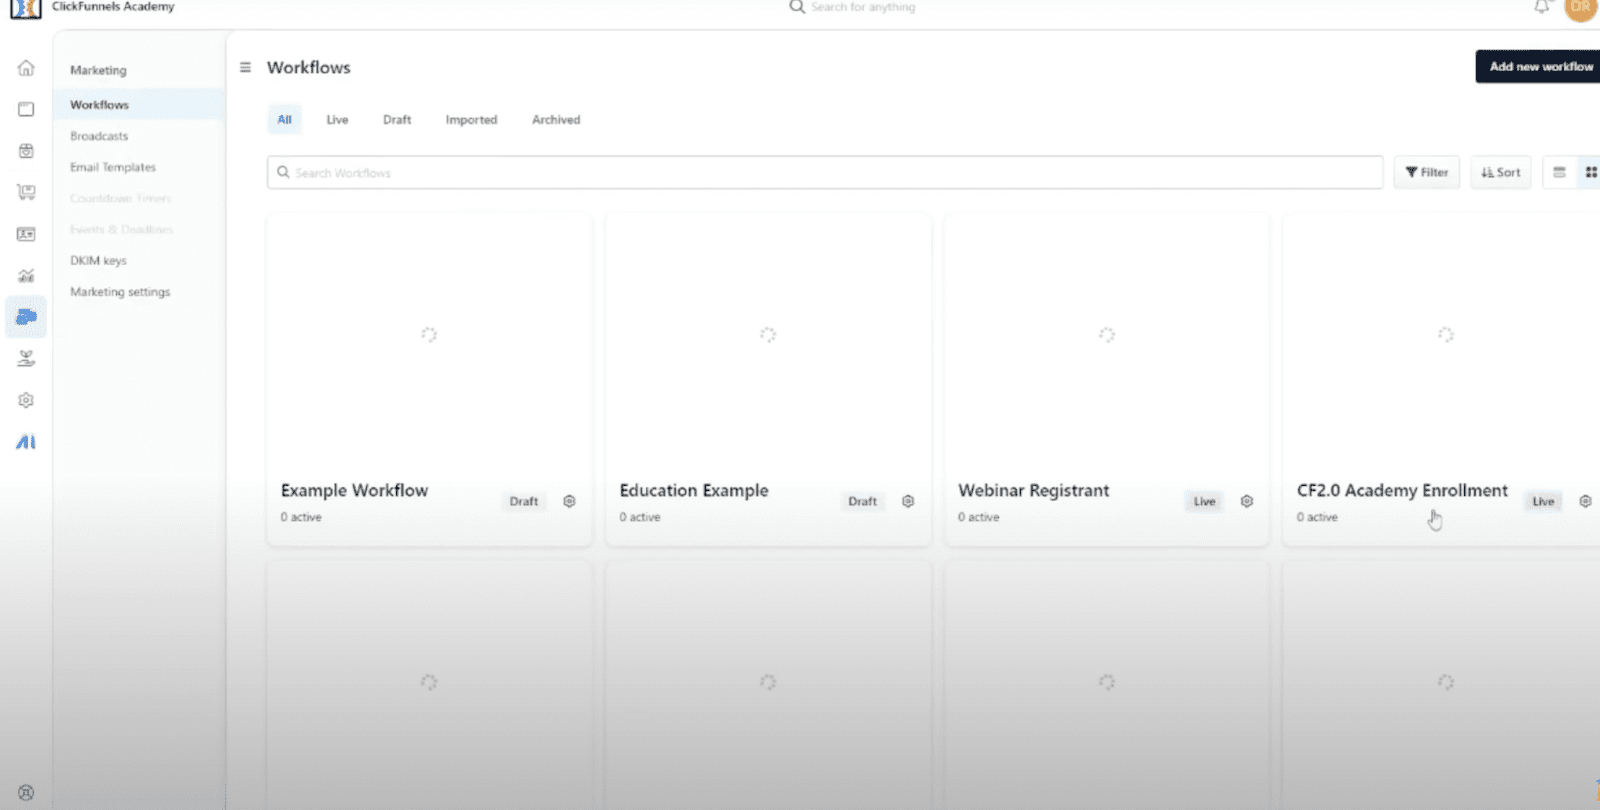
1. Go to the Marketing tab, select Workflows, and click Add New Workflow. Name it and choose how often it should run.
2. Choose an action to activate the workflow, such as a signup or purchase. Specify the funnel page related to this event.
3. Customize your emails and use delays to space them out, creating a natural sequence.
4. Once finalized, activate your workflow, and let ClickFunnels handle the automated outreach.
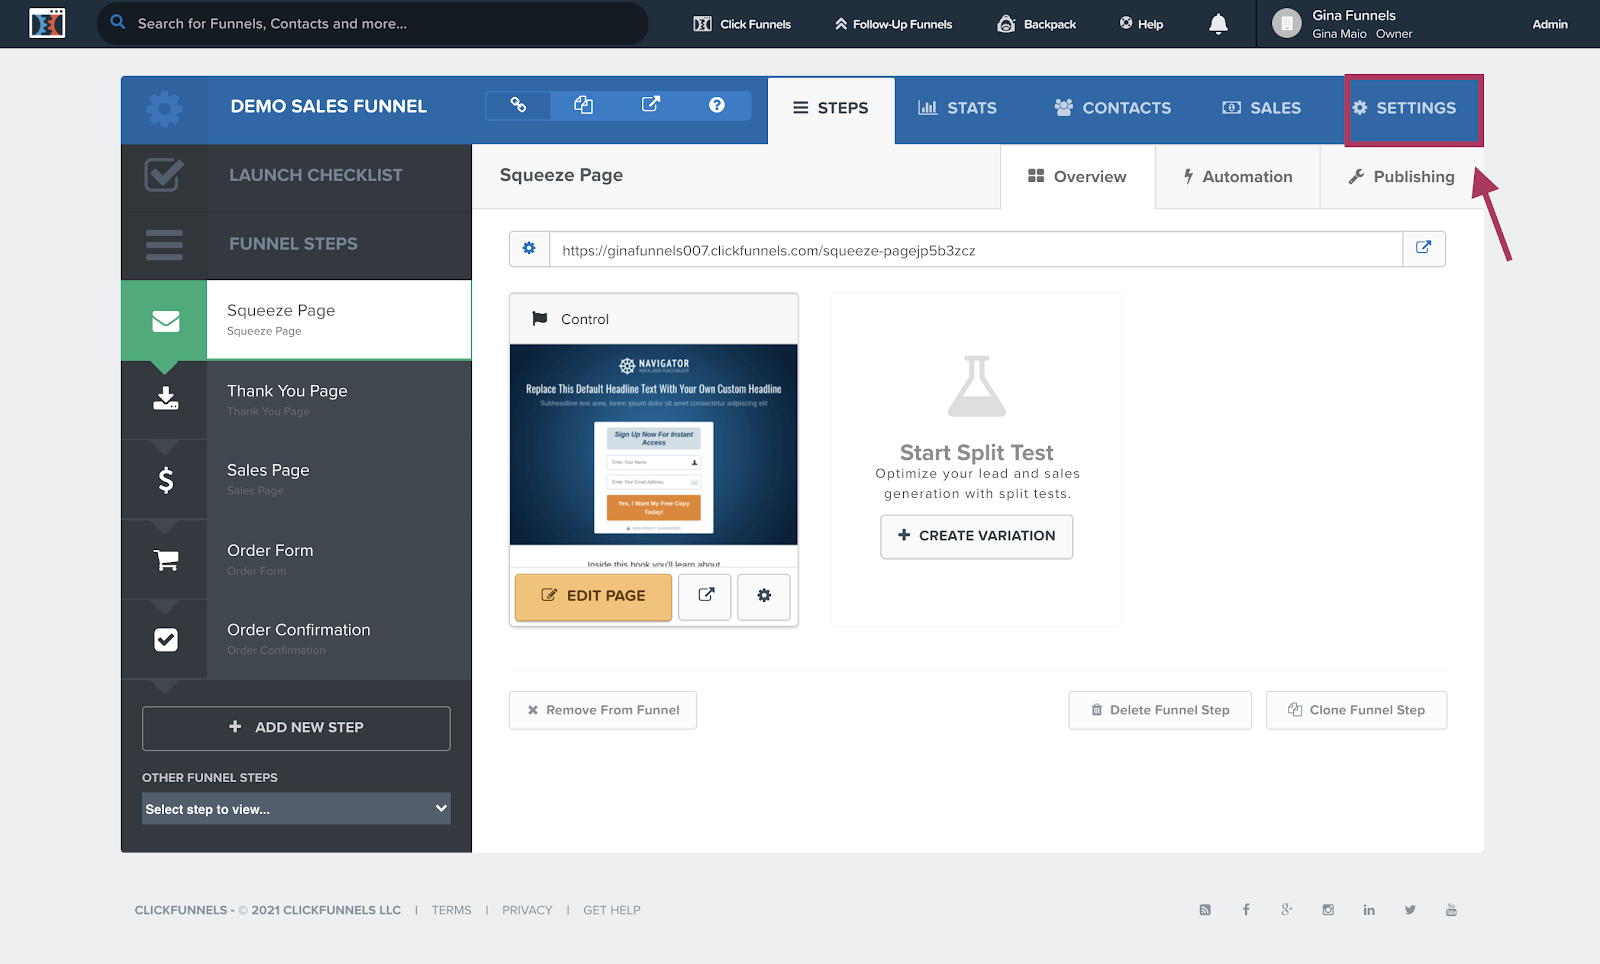
Launching Your Funnel
Once your funnel is set up and you’re ready to go live, here’s how to make it public in a few quick steps.
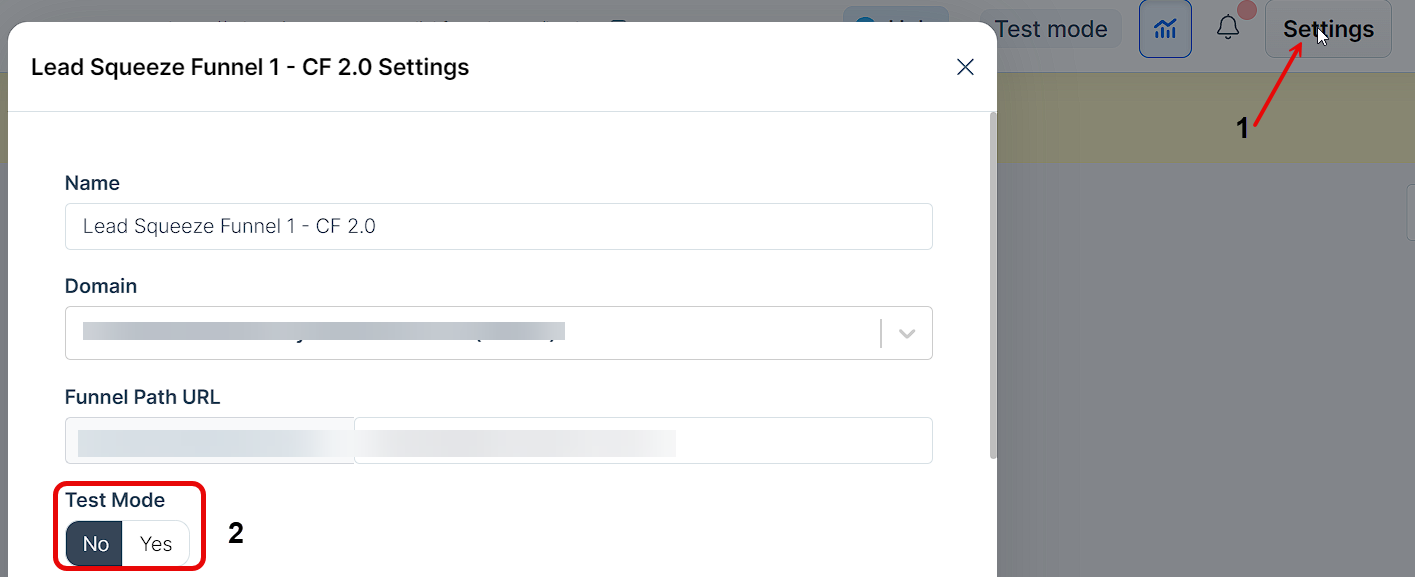
1. At the top-right corner of the funnel workflow page, click on Settings to open up your funnel options.
2. In the settings, switch Test Mode to “No” so your funnel can start accepting real traffic. Then, click Update Funnel to save this change.
3. Your funnel is now live! Copy the URL from the funnel workflow view, and share it across your social media or any marketing platforms.
Analyzing and Optimizing Funnel Performance
Without further ado, here’s a quick guide on refining your funnel for higher conversions and better performance.
1. Run A/B Tests: Experiment with different versions of your funnel pages by adjusting headlines, button placements, or images to see what resonates most with your audience.
This will help you identify high-converting elements.
2. Enhance Your Copy: Ensure that headlines, calls to action, and body text are clear, persuasive, and aligned with your audience’s needs.
A strong, benefit-focused copy can drive engagement and improve conversion rates.
3. Speed Up Page Load Times: Slow pages can lead to visitor drop-offs. So make sure your funnel pages load quickly to keep users engaged and reduce bounce rates.
4. Leverage Analytics: Use metrics like bounce rate, conversion rate, and time on page to pay attention to where your users drop off in your funnel, and identify potential bottlenecks or points for improvement.
Advanced Features and Integrations
ClickFunnels 2.0 goes beyond the basics, its advanced features and integrations can take your business to the next level.
1. Countdown Timers for Urgency
You can set countdowns for one-time events like flash sales or create evergreen countdowns for recurring offers, such as weekly webinars.
2. Store Funnels for eCommerce
You can showcase products, manage variations like size and color, and organize items into collections with Store Funnel.
This feature includes automated upsells and cross-sells to boost average order value, as well as inventory tracking and automated tax and shipping options through integrations like Shippo.
3. Smart Checkout for smooth Conversions
Smart Checkout has options like one-click purchasing, branded checkout pages, and adjustable shipping options which gives your customers a smooth and professional purchasing experience.
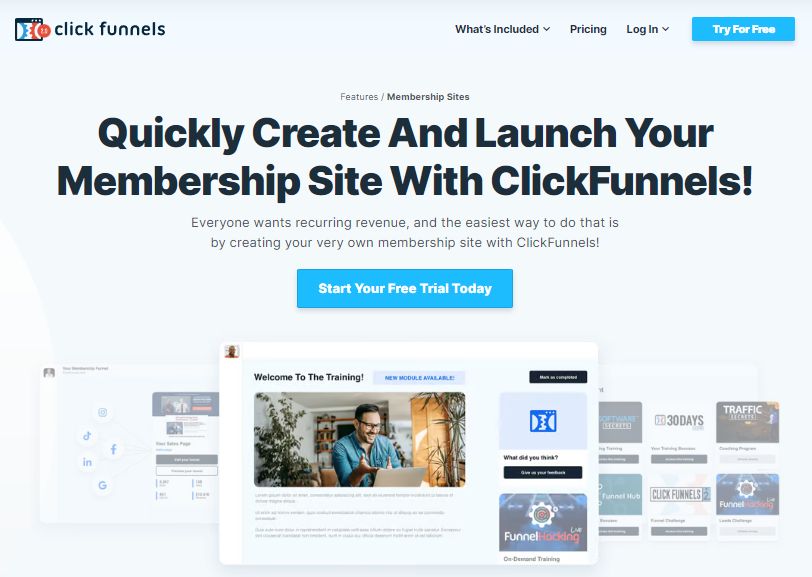
4. Membership Sites for Recurring Revenue
You can build members-only areas, release exclusive content, and automate membership renewals.
5. API and Developer Integrations
ClickFunnels 2.0 includes an API for businesses that need custom integrations.
The API lets you connect ClickFunnels with your existing tech stack without coding which supports your workflows to sync with platforms like Google Sheets, Mailchimp, and more.
6. Enhanced Analytics for Data-Driven Decisions
Advanced Analytics gives detailed insights into your funnel’s performance, tracking metrics like page views, open rates, click-through rates, and conversions.
7. Email Marketing Automation
ClickFunnels 2.0’s Email Marketing tools help you to set up customized email sequences based on your user behavior, like opt-ins or purchases.
8. Community Spaces for Brand Engagement
The Community Spaces feature allows businesses to create a private online community within ClickFunnels similar to a Facebook group.
9. Countdown Funnels for Limited-Time Offers
You can set up entire funnels around time-sensitive promotions. The countdown timer integrates with your funnel pages, emails, and even pop-ups to drive urgency.
10. Integrations with Top Platforms
ClickFunnels 2.0 integrates with a wide range of third-party platforms, from email marketing tools like Klaviyo and Constant Contact to payment providers like Stripe and PayPal.
Troubleshooting Common Issues
Below is a quick guide for you to solve frequent ClickFunnels 2.0 issues.
1. Pages Not Loading: Clear your browser cache, check your internet connection, or disable any conflicting extensions. Use a supported browser like Chrome.
2. Payment Errors: Ensure your payment gateway is correctly integrated, and currency settings match, and test your setup with a sample transaction.
3. Email Automation Issues: Double-check trigger settings, confirm SMTP configuration, and check spam folders.
4. Mobile Display Problems: Use the mobile view in the editor to adjust elements, simplify the layout, and check mobile-only settings.
5. A/B Testing Issues: Verify the A/B test setup and allow time for traffic to gather results.
6. Analytics Not Updating: Refresh analytics, clear your cache, and ensure links to funnel pages are accurate.
7. Membership Access Issues: Check membership permissions, verify payment completion, and resend access emails if needed.
8. Publishing Errors: Make sure Test Mode is off, all settings are complete, and contact support if necessary.
These quick fixes should help keep your ClickFunnels 2.0 running smoothly for an optimized user experience. Right?
Tips and Best Practices for Success.
Moving forward, let’s go through some tips and best practices for success using ClickFunnel 2.0.
1. Conduct Competitor Research
2. Apply Funnel Hacking Techniques
3. Structure Each Funnel Stage Thoughtfully
4. Craft Clear, Compelling Offers
5. Add Trust-Building Social Proof
6. Perform A/B Testing Regularly
7. Personalize Upsell and Downsell Options
8. Utilize Exit Intent Prompts
9. Use Competitive Analysis Tools
10. Ensure Mobile-Friendly Design
Conclusion
In summary, ClickFunnels 2.0 is a website to build and optimize high-converting sales funnels, from setup and design to automation and analytics.
Our key takeaways include starting with a clear sales funnel strategy, utilizing templates and AI for customization, and leveraging advanced tools like countdown timers, smart checkout, and email automation to maximize your results.
Now you have everything needed to create powerful funnels that guide visitors through each step of the customer journey.
It’s time to explore new possibilities and unlock the full potential of ClickFunnels 2.0 to grow your online business.
[…] marketing space for years, known for its robust funnel-building capabilities. With the launch of Clickfunnels 2.0, the platform has undergone significant upgrades, offering more features and an improved user […]